Legacy Open Mesh: Using vouchers
Question
This article discusses creating, configuring and using vouchers with an Open Mesh network.
Environment
- CloudTrax
Answer
This guide is intended to help you set up your CloudTrax wireless network to generate and accept vouchers. With vouchers, you control access on a per-user basis by generating unique codes you can provide to users.
Vouchers can be set to specific time increments or bandwidth tiers, ideal for hotels, coffee shops, apartments, etc. where you want to limit access to users who you authorize to use the network for a specific period of time.
Key features include:
- You keep control of the look and feel of your splash page.
- You create business card-sized vouchers that can be customized with your text and logo.
- You can offer multiple bandwidth tiers, or offer a free lower-speed service tier and one or more paid tiers at higher speeds.
- You can combine vouchers with an open network by keeping the standard "Enter" button and the new voucher button access. This enables a free service level with low bandwidth (the bandwidth options you specify on the SSID#1 tab) plus additional higher speed options you can charge for.
- You can set the number of users per voucher to support multiple devices, laptops, smart phones, etc. under one voucher. In a hotel room or apartment, for example, you may want to allow five or so users per voucher.
- You can use the "Lobby assistant" login to allow hotel or apartment managers to create vouchers without giving access to your full network.
- With automatic MAC Authentication, you can allow users to roam between nodes without seeing the splash page again.
Here's what's about to happen:
- We'll edit a voucher-compatible splash page
- We'll adjust the settings for your vouchers
- We'll create your vouchers
- We'll enable your splash page and test a voucher
CloudTrax integrates with PayPal to provide users with automatic online payment options for network access.
What youll need
To set up vouchers or PayPal on your network, you'll need the following:
- A CloudTrax network running on Firmware 481 or later.
- A computer with a browser pointed to www.cloudtrax.com.
You can see which firmware version you are running by logging into CloudTrax. Click on Manage > Access Points, then click View options and select "Version". Your firmware version appears in the Version column.
Step 1: Edit a splash page
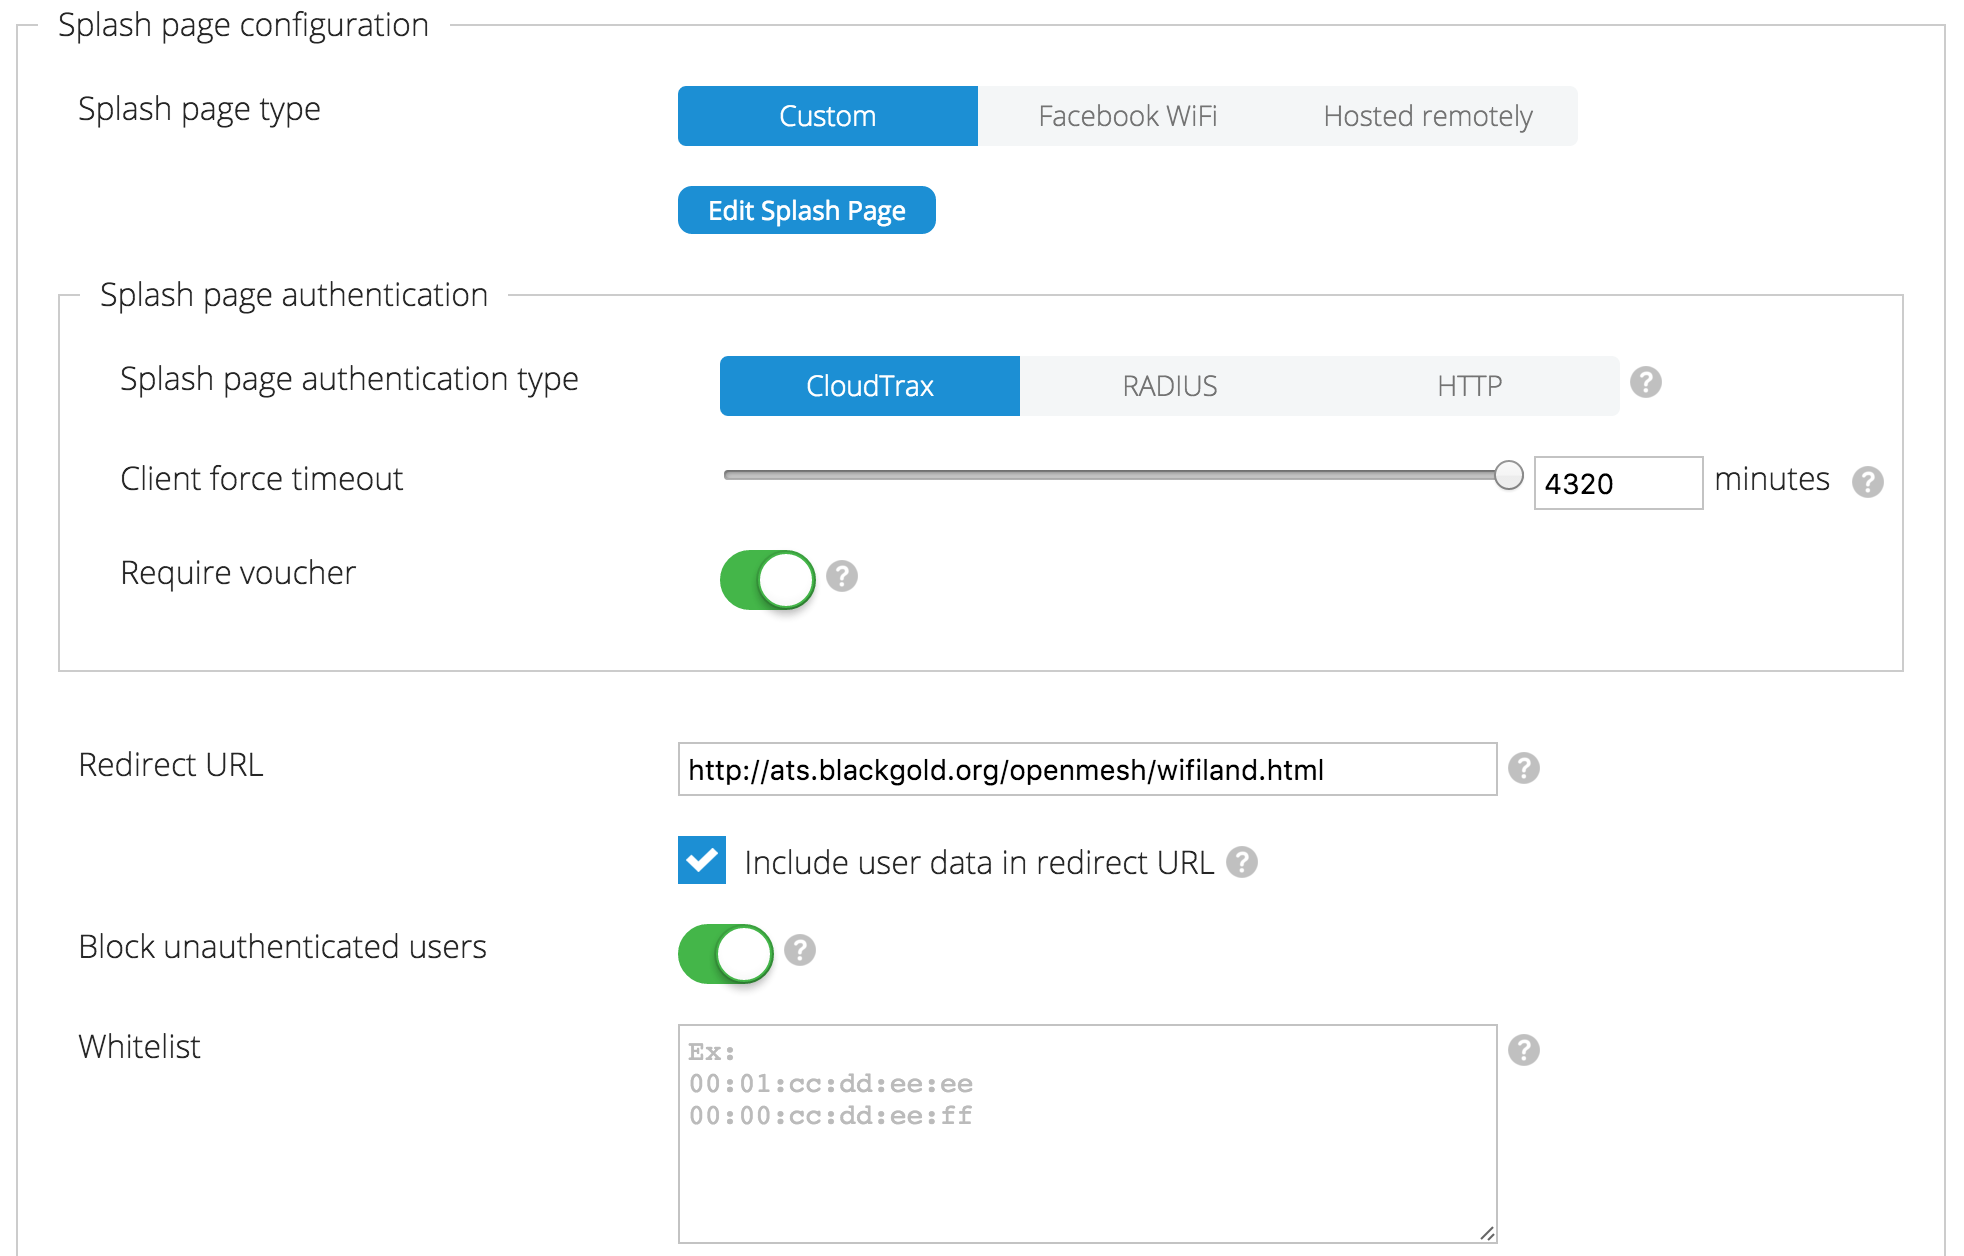
Log in to CloudTrax and select the network you wish to implement vouchers on. Select "Configure" and choose the SSID you want to use as your guest network (typically SSID #1). Enable the splash page, select "Custom" splash page type and click "Edit splash page" to open the splash page editor.
To use the vouchers feature, we need to first select a splash page template with voucher support. This will include the input field needed to request the voucher from the user. Currently, all splash page templates have a voucher option.
At this point, you should decide if you will require vouchers for all users or if you will provide a base level of service without vouchers. This is commonly done to provide a low amount of bandwidth for checking email and light web browsing without a voucher, and offer higher amounts of bandwidth with a voucher.
To provide base bandwidth voucher-free: Keep the standard "Enter" button in addition to the voucher field.
To require vouchers for all access: Delete the standard "Enter" button, leaving only the voucher field.
Edit the splash page as you'd like (being careful to leave the voucher input field and button) and save the splash page.
Step 2: Adjust voucher settings
CloudTrax allows you to change a number of settings to customize access.
Require Vouchers: This option requires a valid voucher on splash pages. If unchecked, allows you to provide a basic tier of service at the rates and durations below and (optionally) faster service using vouchers or PayPal.
Block Pre-Authenticated Users: This option will block all ports until your splash page has been successfully clicked-through. If unchecked, only browsing is blocked. Checking initially disables services such as email, instant messengers, VoIP, etc., but will require first opening a browser to use any Internet services.
Client Force Timeout: Minutes between showing splash page regardless of activity for non-voucher access. 1 day=1440.
Bandwidth Throttling: Enable this to throttle users with non-voucher access. Voucher-specific throttles will override this setting.
Step 3: Create vouchers
Next, click the Manage > Vouchers link in the left-side menu in the dashboard. This will open a table showing your existing vouchers, which you can edit, renew, delete, export and reprint as needed. Since we haven't created any vouchers yet, this table should be empty.
In the top right corner above the table, you'll see three options: Create Vouchers, Edit Voucher Settings, and Actions to take on existing vouchers.

Click the Create New link in the top right corner of the screen. This will open a page asking you to enter several options, including:
Quantity: Number of vouchers you would like to create/print.
Paper Size: Select the size of paper youd like to print on.
Comment: Relevant note that will appear on the Vouchers page, such as room number, last name, etc. Will not appear on the voucher(s) when printed out.
Duration (hours): The number of hours each voucher will be valid (starting from first use).
Max Devices: The maximum number of devices (computers, smart phones, gaming consoles, etc.) that can use this one voucher. Allowed values are 0-9. Use 0 for unlimited devices.
Note that if you are using 0 for unlimited devices, individual devices connecting using this code will not report and the voucher will show as "Unused."
Download limit: Download limit in Mbits/sec, per user, for this voucher batch. Use the slider or enter a value such as .375 for 375kbps.
Upload limit: Upload limit in Mbits/sec, per user, for this voucher batch. Use the slider or enter a value such as .125 for 125kbps.
Purge after: How long before unused vouchers are deleted.
When you are happy with your voucher settings, click "Create Vouchers."

Click the "Print vouchers" button now to print them, or select the "Edit Voucher Settings" icon to customize the look of the vouchers before printing.
Duration Text: Text to print to indicate how many hours voucher is valid.
Access Text: Text to print on each voucher before the voucher code.
Show Border: Check to draw a border around each voucher. Useful if you are not printing on business card stock.
Show Image: Include logo on each voucher.
Voucher image: Upload the image you would like to show.
Save Defaults: Select to save these settings as your defaults for this network. These settings will be used by the Lobby Assistant login.
Management > Share Vouchers: When enabled, vouchers created on this network will be usable on all other networks under this account.
Lobby Assistant > Password: Create a password to limit control of CloudTrax to features required for creating and printing vouchers. Users must login with your network name and this password.
When your settings are correct, click "Save Changes."
At any time, a user authenticated using the "Free Access" option can enter "http://logout" in their browser to return to the splash page and log in with a voucher code or purchase a voucher via PayPal. This does not work with voucher sessions.
Note: A user already authenticated with a voucher code must wait for that voucher to expire before they will see the splash page again. http://logout will not redirect them to the splash page.
Note that vouchers can be created for a duration of up to 1 year, however they must be used for the first time within 90 days of creation or they will be automatically deleted.
If you replace the Valid: 1 Hours CloudTrax logo in the top left corner of the screen with your own, that logo can be used on vouchers.
Logo files should be sized to 175 pixels wide by 75 pixels tall for the best results.
Step 4: view the Edit/View Vouchers page
Select Manage > Vouchers from the left menu to go back to your Vouchers page.
From the Vouchers page, you'll see a list of all existing vouchers. These can be edited, renewed, reprinted, exported as CSV or XML, or deleted at any time, either by selecting the gear icon next to individual vouchers, or by selecting multiple vouchers and using the gear icon in the top right corner of the table.
When you generate a voucher, it is added to your network on CloudTrax. Vouchers are good for the specified period beginning with their first use. So a 1 day voucher is good for 24 hours from first use, not 24 hours of actual online activity over a longer period. Note that expired vouchers will be auto-removed every night so you don't have to delete them manually.
CloudTrax imposes a cap of 1,000 unused and active vouchers. Be sure to use all the vouchers you create all vouchers within 90 days to avoid the cap.
Step 5: test
When you connect to the SSID you just enabled vouchers on, you should see your new splash page. To test the system, simply enter one of the voucher codes you created and connect.
Step 6 (optional): use Lobby Assistant
As noted in the introduction, Lobby Assistant gives you a separate login for lobby or apartment managers to create vouchers in real-time without giving access to the full network.
To enable Lobby Assistant, simply set a unique password for Lobby Password in the Configure > Vouchers page of CloudTrax.
To login to Lobby Assistant, use your network name and Lobby Assistant password at CloudTrax.com.
When you log in to Lobby Assistant, you'll see a list of all existing vouchers identical to the list you saw in the full version of CloudTrax under the "Vouchers" link. As in CloudTrax, these can be edited, renewed, reprinted, exported as CSV or XML, or deleted at any time.
Next steps
To enable automatic online payments for your network using vouchers, read the Using PayPal in CloudTrax Guide.
To use Lobby Assistant or train others, read the Using Lobby Assistant Guide. This guide is written specifically for hotel and apartment front-desk staff.


